Automation
You can use MultiBrowser to automate your ongoing testing effort so less time is spent on manual testing. For this there are different features available:
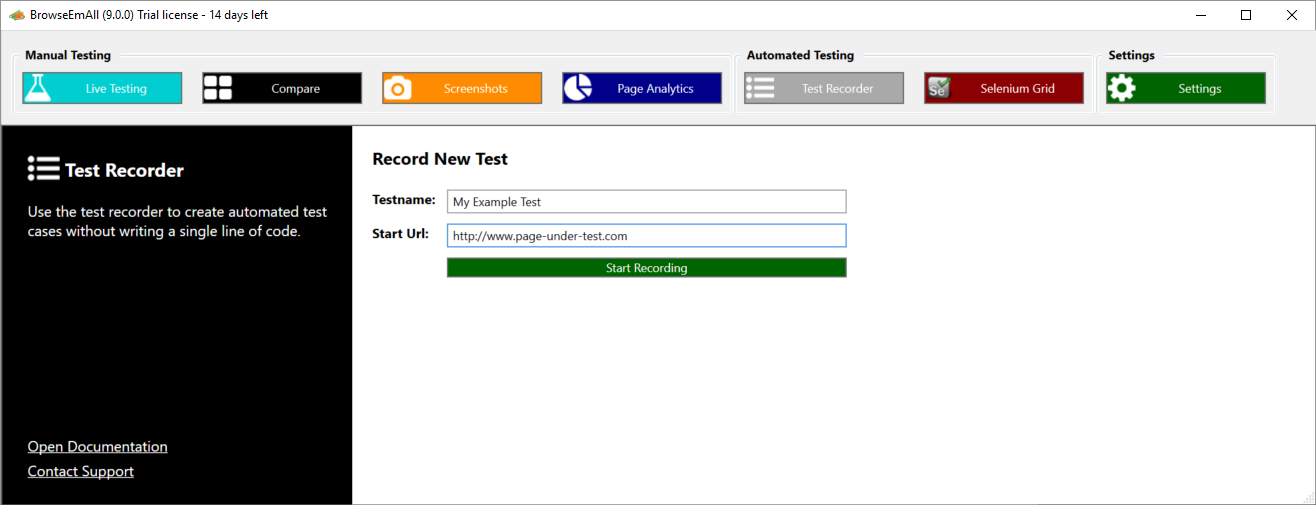
Recording Tests
MultiBrowser gives you the possibility to record test cases directly in a browser and store them for later execution. This way you only have to record a test once and can run it in any browser supported by MultiBrowser.
Start a recording session
To record a new test case select Test Recorder in the top navigation and click on Record New Test. Enter a name for the test case and the URL you want to test.
After a click on Start Recording a new instance of Chrome will launch. All user interaction inside this instance will be recorded for the test case.
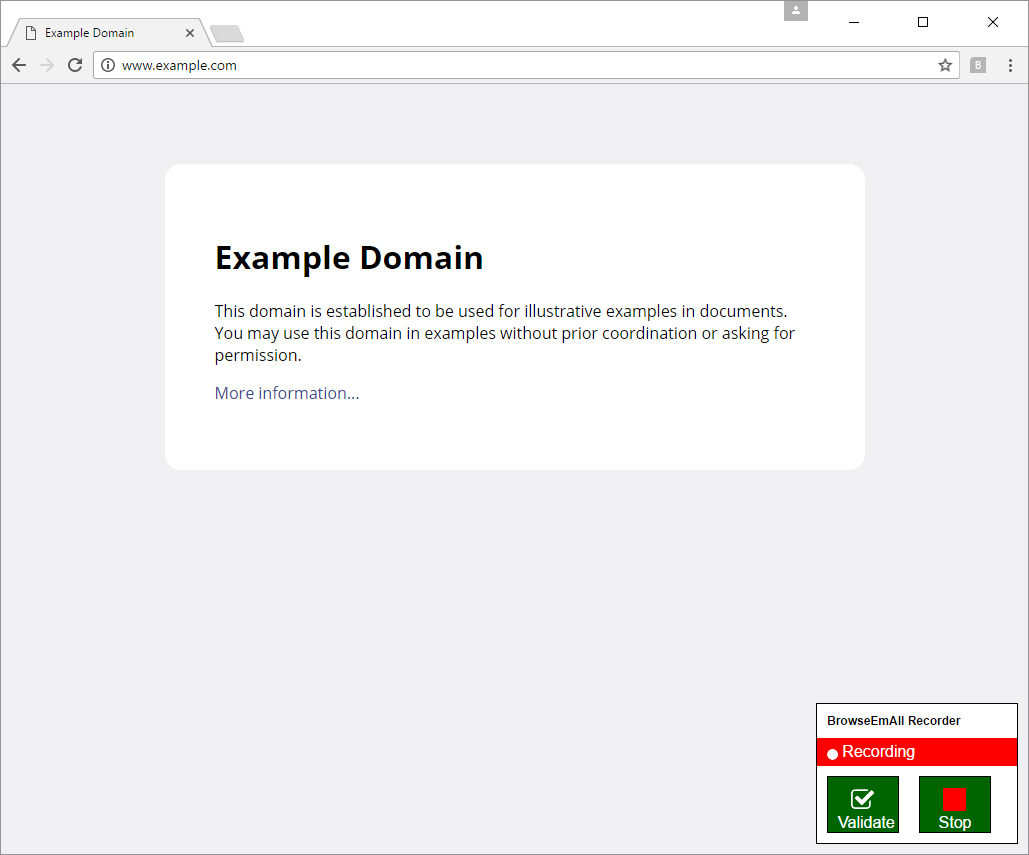
Note
Only actions on the web page will be recorded not any actions you take in the browser UI (like the back button for example).
Validating page state
Almost any test case will need some form of validation to make sure the page under test works correctly. For this you can add a validation using the recorder. To do so take a look at the bottom right of the launched Chrome instance. Here you can click the Validate button to start recording a validation. Now click any element or select any text you want to verify in your test case. This can be almost any element inside the web page.
End a recording session
After you have recorded all the necessary steps and validations for your test case you can use the Stop or Stop Recording buttons to end the recording session. The Chrome instance will be closed and after a few seconds your new test case will be displayed on screen.
Note
Make sure to click on the Save button to save your test suite.
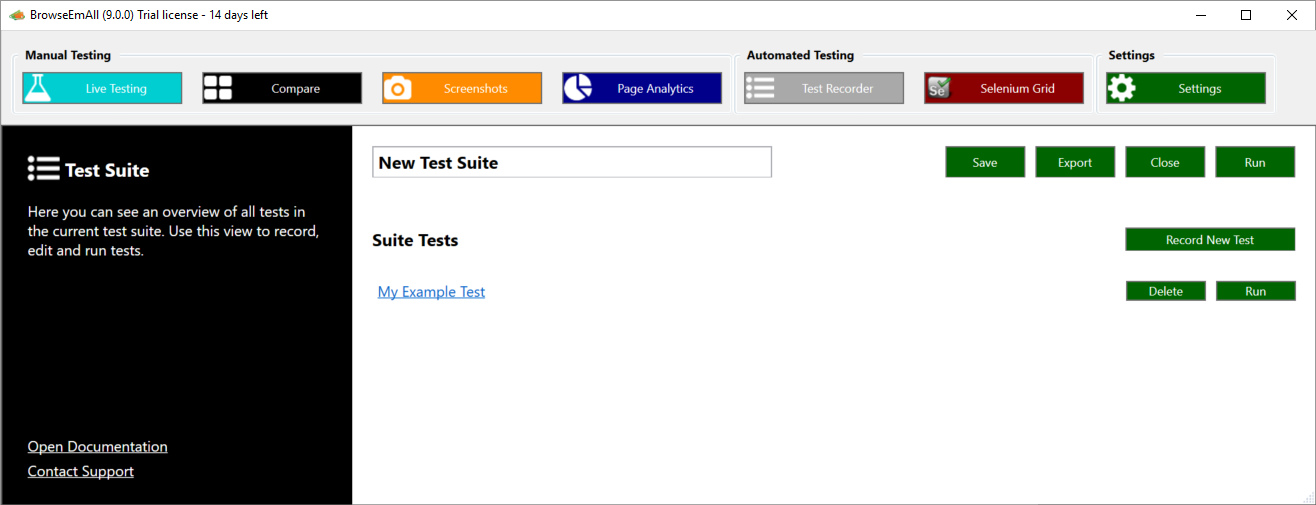
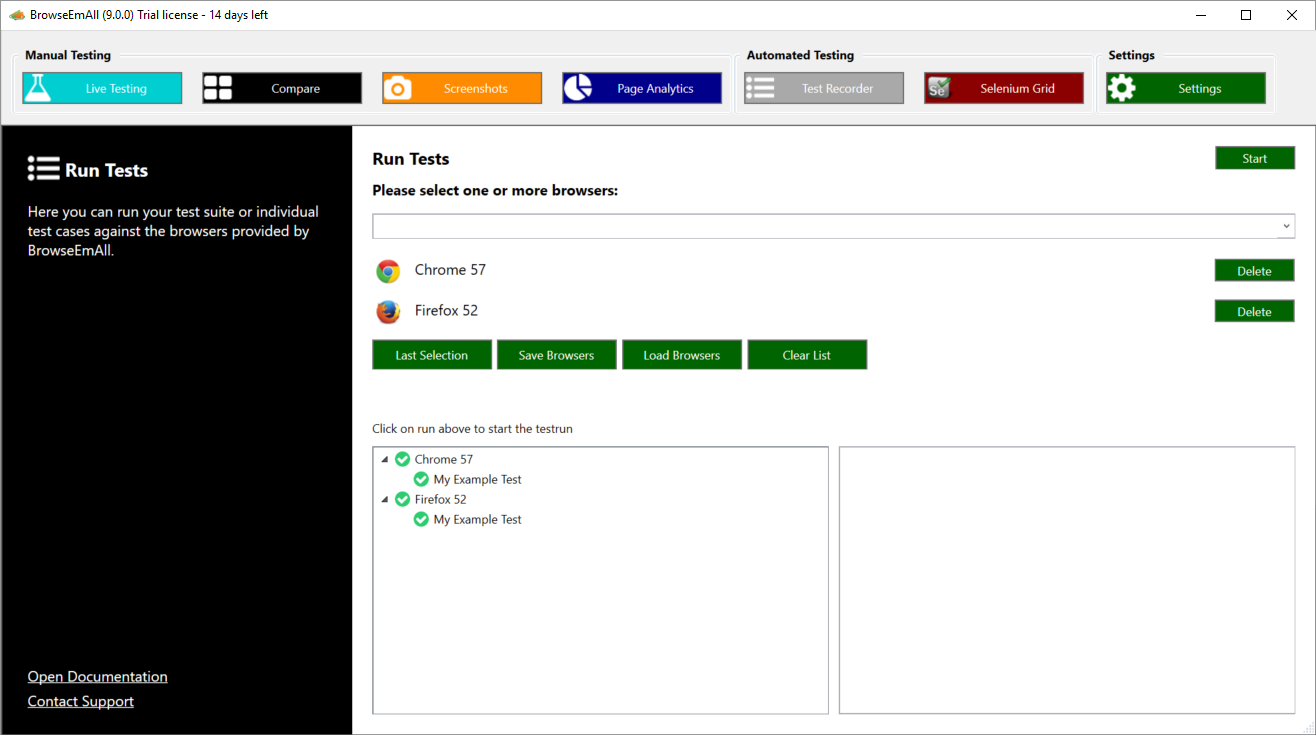
Running Tests
You are able to run your recorded test cases against any browser provided by MultiBrowser. This can be repeated any time you need to run your tests.
To run a single test case or a test suite select Test Recorder in the top navigation and open your existing test suite file. After a click to Run either for the hole suite or a single test case you will be able to select the browsers you want the test(s) to run in.
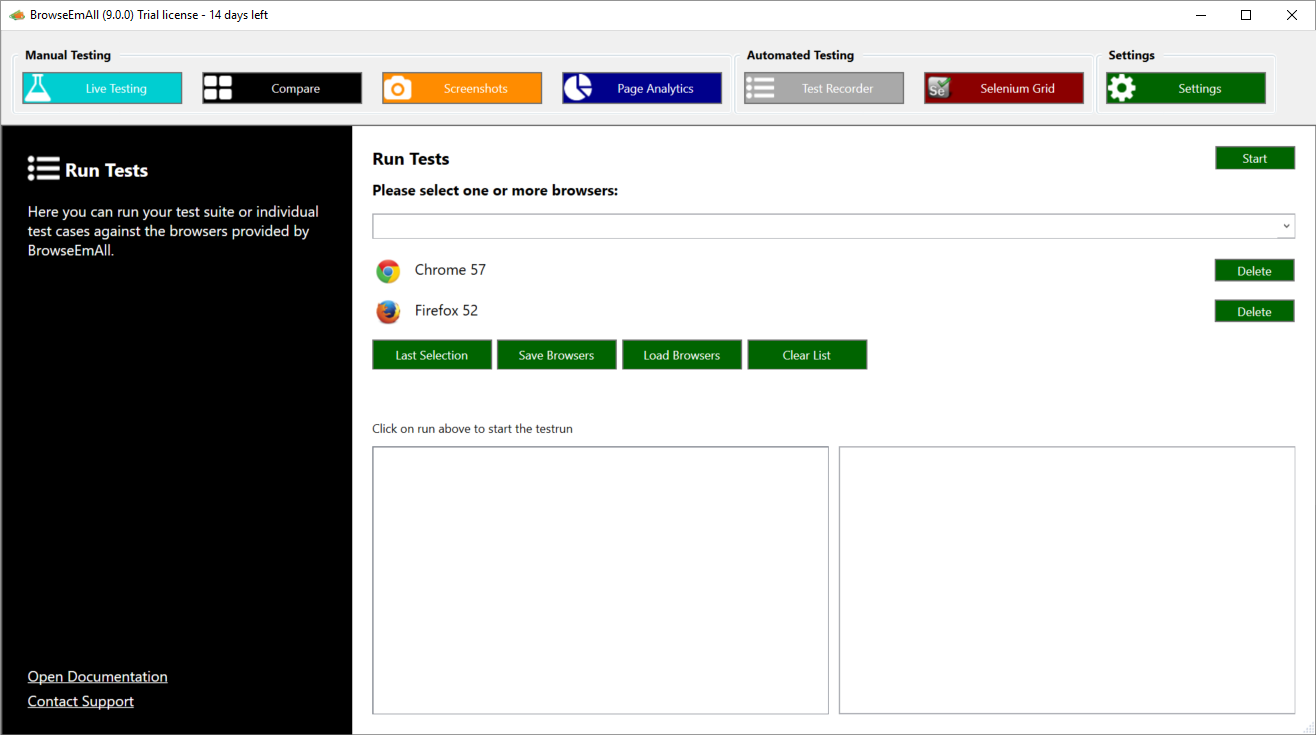
Select all browsers you need and click Start to begin the test run. Depending on the number of browsers and test cases this can take a while. The application will report back to you once the test run has been completed.
Warning
For a reliable test execution you should not use your machine while test cases are running.
Exporting Tests
If you want to execute your recorded test cases outside of MultiBrowser you can export them to one of the supported programming languages:
- C#
- Java
- Ruby
- Python
To run an export select Test Recorder in the top navigation and open your existing test suite file. Now click on Export, select the programming language of your choice and a destination file name.
Selenium Integration
You can run your existing Selenium test cases against all the browsers provided by MultiBrowser. This way you can skip all the necessary configuration work you need to do to make Selenium work. For this MultiBrowser has an integrated Selenium Grid which you can start really easy.
To start a new Selenium Grid select Selenium Grid in the top navigation. Select if you want to run as a Hub (everything is running on the local machine) or a Node (this machine will join a hub running on another machine).
In the second step select all browser you want to test against. After a click to Start Grid the Selenium Grid will be started. Depending on your browser selection this can take a few minutes as virtual machines are created.
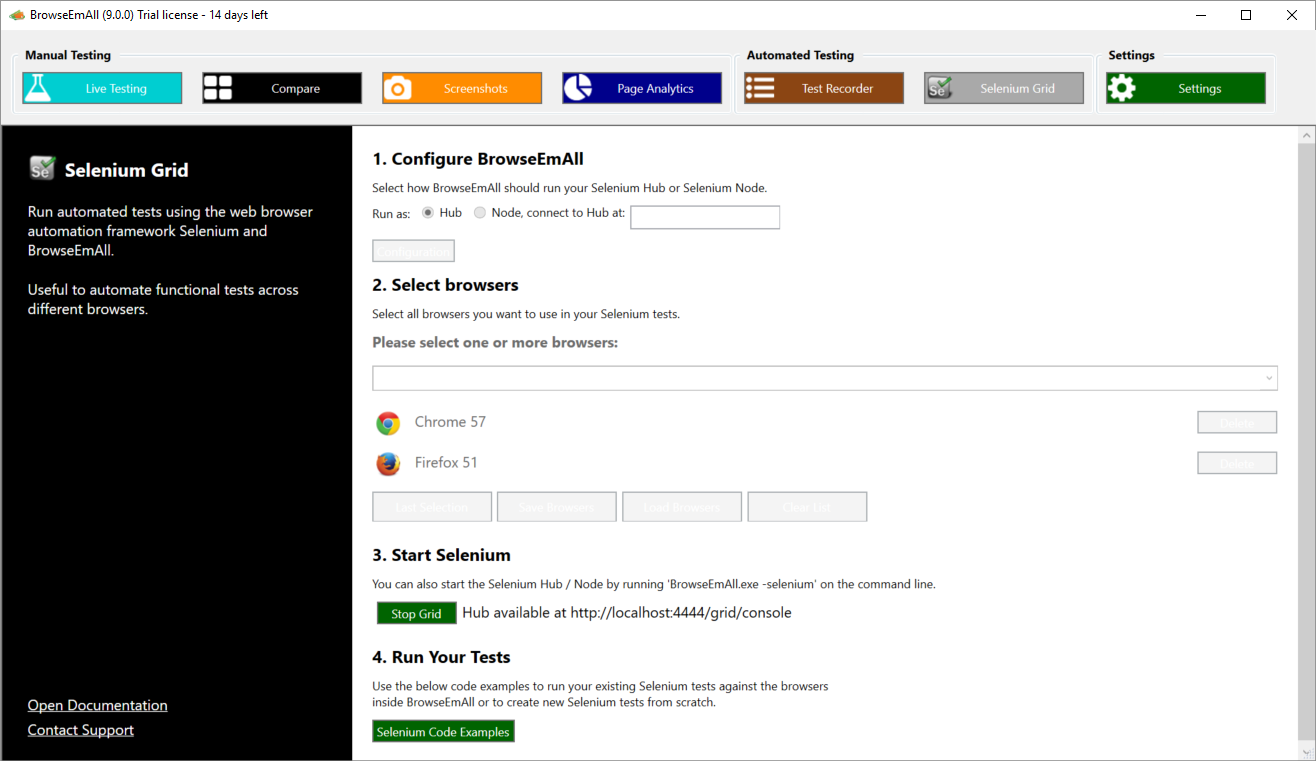
Now you can run your existing Selenium tests against the provided Selenium Grid. Click on Selenium Code Examples inside the application to see a few examples in different programming languages.